Microblading Aftercare and Healing, Day by Day
Microblading Aftercare, in Short
Microblading aftercare means keeping the brows clean, barely moisturized, and away from water, sweat and sun for the first 10 to 14 days. Blot the lymph on the first day, wash gently twice a day, never pick the flakes, and skip the gym, pool and sauna until the skin has finished shedding. Done properly, this is the difference between brows that hold for two years and brows that fade in eight months.
Here is the full protocol and the day by day timeline we walk clients through at Subbot Beauty in West Roxbury, Boston. Not booked yet and just researching? What is microblading covers the technique itself, who it suits and what it costs.
Microblading aftercare rules
The first 24 hours
Blot the lymph: Press the brows with a clean tissue every 30 to 60 minutes for the first three to four hours. Lymph left to dry on the surface turns into thick scabs, and thick scabs take pigment with them when they fall.
Blot, never wipe: Use a light pressing motion only. Wiping drags pigment sideways while the skin is still open.
Keep the area dry: No water on the brows for the first 24 hours, including in the shower.
Sleep on your back: A pillow rubbing one side for a few nights is one of the most common causes of uneven healing.
Days 2 to 14
Wash gently, twice a day: Clean fingertips and a mild fragrance free soap, then pat dry with a paper towel. Clean skin heals thinner and holds more pigment than skin left to crust.
Do not pick or scratch: Any flake you pull off takes pigment with it and leaves a gap that has to be rebuilt at the perfecting session.
No sweating for 10 to 14 days: No gym, swimming, sauna, steam room or hot yoga. Sweat and chlorine both lift pigment out of fresh work.
Shower around the brows: Keep the spray off your face and wash around the area, not over it.
No makeup or skincare on the brows: Nothing on the area, including sunscreen, until the flaking has finished completely.
Keep the area out of the sun: Direct sun on healing skin shifts the color and fades it early. A hat is easier than sunscreen at this stage.
Keep it clean between washes: Pets, gym equipment and unwashed hands stay away from the brows while the skin is open.
Follow your artist's protocol: Dry healing and moist healing are different systems, and mixing the two is worse than committing to either one.
The microblading healing timeline, day by day
Days 1 and 2: bolder and darker than you expected
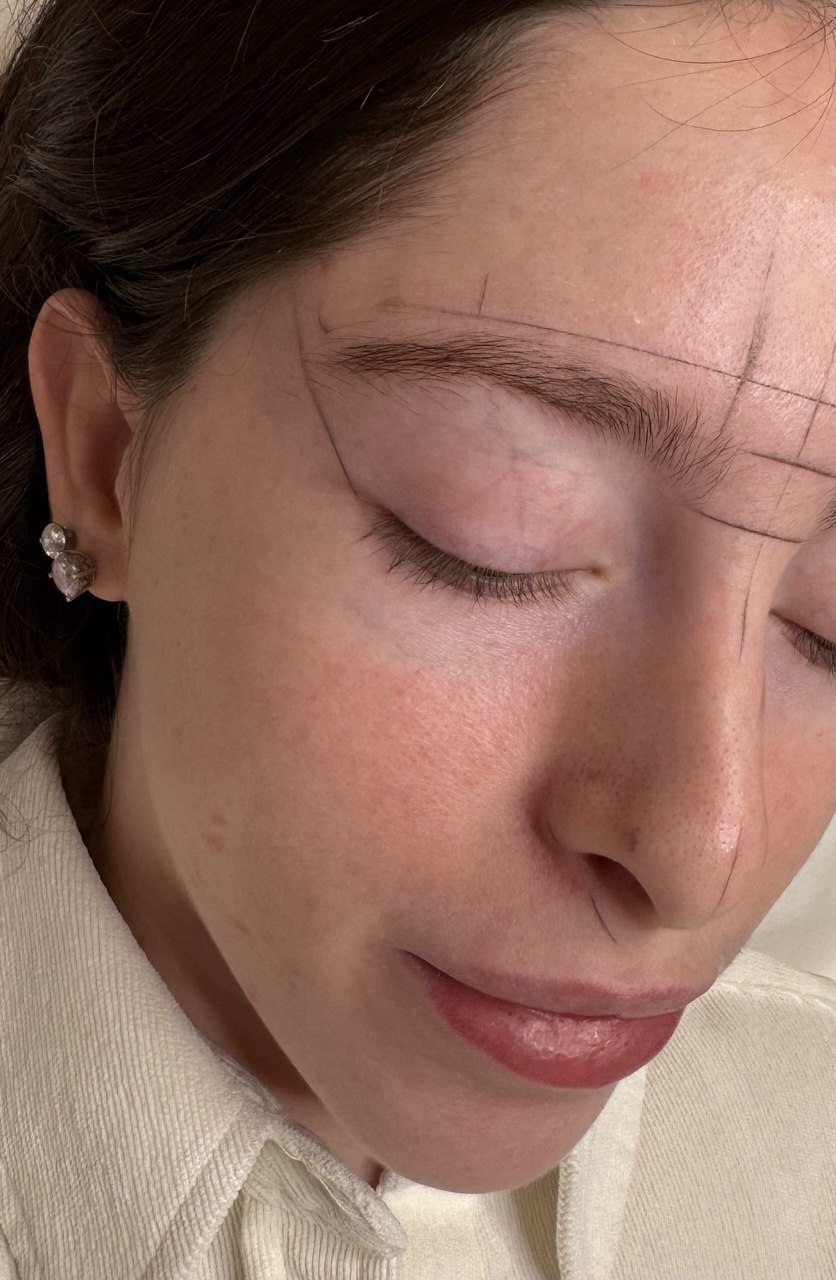
Fresh strokes look sharp, dark, and about 30 percent stronger than the final result. There may be mild redness and slight swelling around the brow. This is the stage that produces the panicked mirror check, and it is the least representative moment of the whole process.
Days 3 to 5: tightening
The area feels tight and itchy, and a thin layer of dry skin starts forming over the strokes. Color may look even darker before it changes. Do not touch, scratch, or help anything along.
Days 6 to 10: flaking
The surface skin begins to shed, usually unevenly, so one brow can look finished while the other looks half gone. Any flake you pull off takes pigment with it and leaves a gap that has to be rebuilt later. Let every piece fall on its own.
Days 11 to 14: the ghosting phase
This is where clients message us. The brows look faded, patchy, or almost invisible. The pigment is still there, sitting under a fresh layer of skin that has not become translucent yet. Nothing has gone wrong, and nothing needs fixing.
Weeks 3 and 4: color returns
Strokes reappear, softer and warmer than on day one. This is roughly what you are keeping, though the tone continues to settle.
Weeks 6 to 8: the perfecting session
Now the true result is visible and we can see how your skin held the work. The perfecting session evens the color, restores anything the healing took, and adjusts density. It is part of the process rather than a repair, and skipping it is the most common reason someone says their microblading only lasted a few months. At our studio a touch-up is $300 and is booked separately.
How to prepare for microblading
Preparation is about one thing: keeping your skin calm and your blood from thinning, so pigment goes in cleanly and stays in.
Stop acids and retinol two weeks before: No retinol, glycolic or salicylic acid, or exfoliating products on the forehead and brow area.
No alcohol or heavy caffeine for 24 to 48 hours: Both thin the blood and make the skin bleed more, which pushes pigment back out.
Skip fish oil, vitamin E and ibuprofen for a few days: Unless a doctor has told you to take them. Never stop prescribed medication on your own.
No waxing, threading or tinting for a week before: We need to see your natural growth to map the shape.
No sunburn, fresh tan or peels for two weeks before: The skin has to be calm on the day.
Time Botox around it: Either two weeks before or four weeks after. Brow position shifts as it settles, and mapping has to be done on your resting face.
Come with your brows as you normally wear them: Filled in if you like. It tells us more about the shape you actually want than any reference photo.
Who should postpone microblading
Some situations mean waiting rather than never, and a consultation is the place to sort that out honestly.
Pregnancy and breastfeeding.
Isotretinoin, or Accutane, within the last six to twelve months. It changes how skin heals for a long time after the course ends.
Active eczema, psoriasis, dermatitis, or a breakout in the brow area. Wait until the skin is settled.
A tendency to form keloid scars.
Blood thinners, uncontrolled diabetes, autoimmune conditions, or ongoing chemotherapy. These are not automatic refusals, but they need your doctor's clearance first.
Very oily skin. Not a health issue, but strokes blur as they heal, so we usually recommend nano brows or powder brows instead.
Normal, and not normal
Normal: redness on day one, tightness, itching, uneven flaking, a color that looks too warm at week three, one brow healing faster than the other.
Not normal, and worth calling us about: swelling that increases after day two, yellow discharge, spreading heat or pain, or a fever. Those are signs of infection rather than healing, and they need attention rather than patience.
After it is healed
Once the skin has closed, the job becomes protecting the pigment. Daily SPF on the brows is the single most effective habit, all year, not only in summer. Keep retinol and acids off the area permanently, not just for the first month. Book a color refresh while the shape is still readable rather than waiting until it has nearly gone, since a boost on a visible shape is simpler than a rebuild.
Common questions about microblading aftercare
How long does microblading take to heal?
The surface heals in 10 to 14 days, which is when the flaking finishes. The pigment finishes settling at six to eight weeks, and that is when the perfecting session is booked and the true result is visible.
Can I wash my face after microblading?
Yes, but wash around the brows rather than over them for the first 24 hours. From day two you clean the brows themselves gently, twice a day, with clean fingertips and a mild fragrance free soap.
What happens if a scab comes off early?
You lose the pigment underneath it and a gap forms. It is not permanent damage, and it is rebuilt at the perfecting session at six to eight weeks, but it is the single most common reason a result heals patchy.
When can I go back to the gym after microblading?
After 10 to 14 days, once the flaking has finished. Sweat lifts pigment out of fresh work, so an early workout costs you color that has to be replaced later.
Can I wear makeup on my brows while they heal?
No makeup, sunscreen or skincare on the brow area until the flaking has finished completely. Makeup elsewhere on the face is fine as long as it stays off the brows.
How long does microblading last?
Microblading lasts one to three years depending on skin type, sun exposure and how well the aftercare was followed. Oily skin fades fastest. We go into what makes pigment fade faster in how long does permanent makeup last.
Does microblading hurt?
Most clients describe it as light scratching rather than pain. A topical numbing cream is applied before and topped up during the session, and the area is usually more tender the day after than during the appointment itself.
If you are still deciding between techniques, nano brows vs microblading vs powder brows compares all three side by side. Work that has already aged into the wrong shade or shape is a different conversation, handled through correction and redesign or, when the pigment is too dark to work over, saline removal.
Microblading in Boston
Every procedure at Subbot Beauty is performed personally by Olesya Subbot, with over eight years of experience in permanent makeup, using REACH-certified pigments and single-use tools. If you are weighing microblading against nano brows, powder brows, or lip blush, a free consultation is the place to start, and you can read more about the studio on our about page. We see clients from across Greater Boston, including West Roxbury, Roslindale, Jamaica Plain, Newton, Brookline, and Dedham.